Introduction
this fixes the infinite spinny dial problem where it like spins constantly regardless of actual input.
the problem is a broken ribbon cable; this is caused by a design flaw that puts too much pressure on it, breaking a couple connections.
the fix is replacing the entire ribbon cable;
the part can be found on aliexpress listed as "sony a7 ii flex cable", you would want the one listed as "with ic" (unless you feel like doing a ton of smd soldering)
some of the pictures on this guide are an a7r ii - these (pictures) are identical to an a7 ii.
Parts
-
-
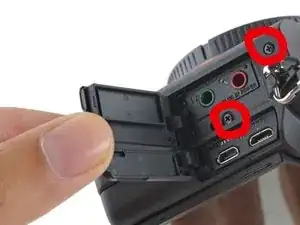
there are 2 screws in the bottom of the battery compartment; one is silver 5mm, the other is just another 4mm
-
-
-
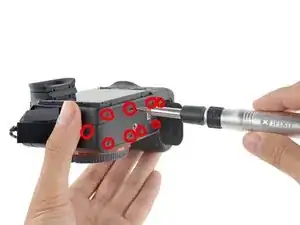
open camera screen. remove screws underneath screen not by hinge will all be 3mm #000 phillips screws (*3)
-
remove hinge screws. these are all 2mm #000 philips screws (*4). --- these are the only 2mm screws in the entire camera.
-
-
-
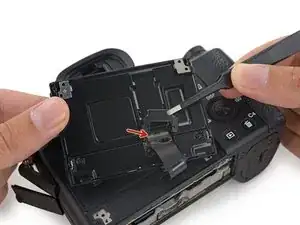
remove the ribbon cable from it's bracket. this is a thin metal strip that you slide upwards and pull out from the screen hinge/casing to remove. Use a little isopropyl alcohol to dissolve the adhesive securing the ribbon cable to it's bracket.
-
there is another thin metal casing on top of the screen's zif connector. this is removed by simply sliding it downwards.
-
-
-
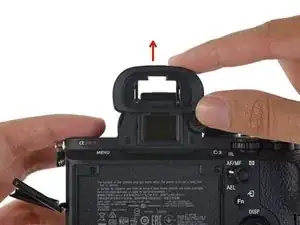
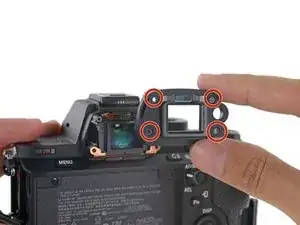
remove viewfinder eyepiece. (slide upwards)
-
remove 4 screws on viewfinder (4mm #000 *4)
-
remove diopter adjustment wheel. this uses a special screw - keep the screw and the wheel together.
-
-
-
with the screen removed, the faceplate can be removed from the back of the camera. Pull out the faceplate towards yourself.
-
To reassemble your device, follow these instructions in reverse order.