Introduction

  1. 3xuNQIhuXs2XUDwB
    • Remove the four rubber feet of the device using a metal spudger.

  2. 1ei14ULmbwWVfTiO
    1ei14ULmbwWVfTiO
    utorX5oROpEptkcn
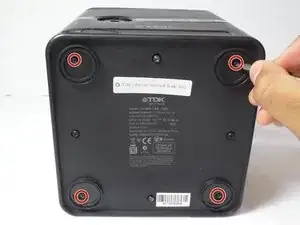
    • Remove the four 9 mm Phillips #0 screws located under the feet of the device.

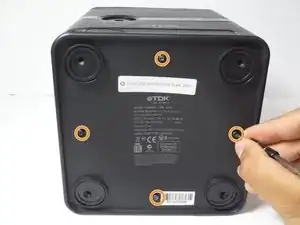
    • Remove the four 9 mm Torx #8 screws located on each side of the bottom the device.

  3. vsJ1XXupavPuJIFr
    vsJ1XXupavPuJIFr
    pOD5MwkMGkJrFVsu
    • Pull the bottom cover of the device towards you.

  4. HbXjAUjt2SDoCDup
    HbXjAUjt2SDoCDup
    rOsORsOrMEt4Cxsv
    • Remove the four 13 mm Phillips #1 screws.

  5. aiQA3cHgBSHTNOJc
    aiQA3cHgBSHTNOJc
    rMwpc26rsDZsZVpk
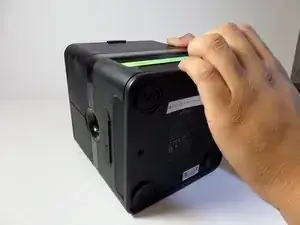
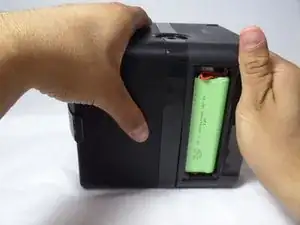
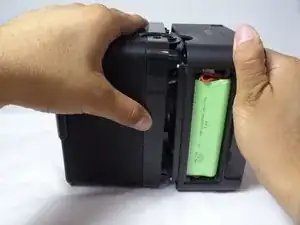
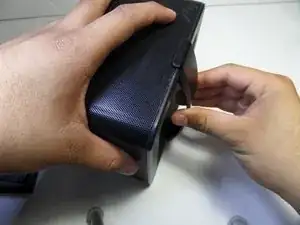
    • Use one hand to grip the device from the side of the handle, and use the other hand to grip the side of the device that contains the woofer

    • The woofer is the circular component located at the bottom of the device after the bottom cover has been removed

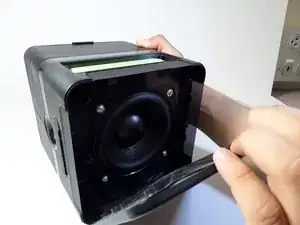
    • Pull apart the compartments by applying force in opposite directions.

    • Do not pull with extreme force!! There are many electrical wires inside the device that can become damaged if the bottom panel is removed without care

  6. CdfTOgkcIr5Tu5Ug
    • Disconnect the seven cables attached to the motherboard.

    • Do not use too much force when pulling on the wires. Pulling with too much force can damage the wires.

  7. qtsoBoGlOZgNWnG5
    • Remove the four 8 mm Phillips #1 screws.

  8. XHJTq4hWQ2En1Zh4
    XHJTq4hWQ2En1Zh4
    egQrlmLoMObOgAoe
    DYNieHqq5seeeB4w
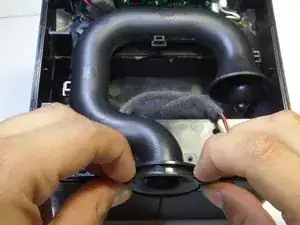
    • place your hands on each side of the air vent and then place your index finger on the thin plastic half circle that holds the vent in place.

    • Pull the plastic half circle towards you.

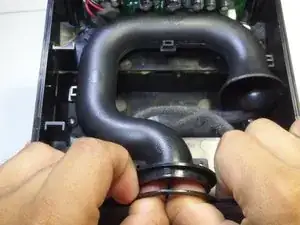
    • Put both of your hands inside the tube as shown and push away from you.

  9. 6OL6PIHqFGdbsoxT
    6OL6PIHqFGdbsoxT
    N22xolWvBELYMEES
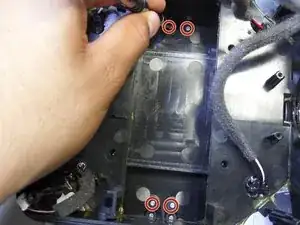
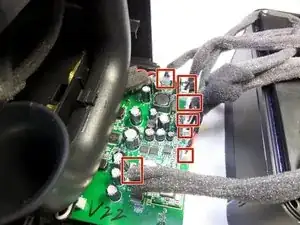
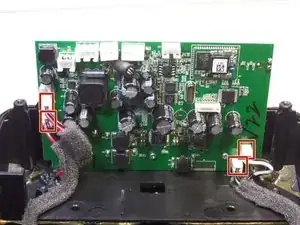
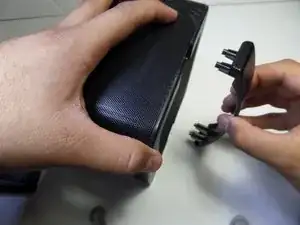
    • Remove the four wired clips by pulling on the wires.

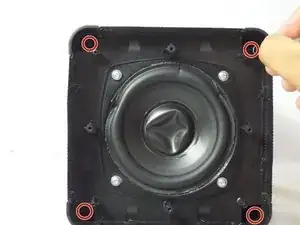
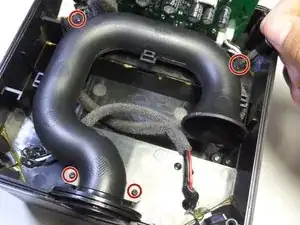
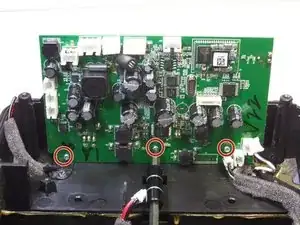
    • Remove the three 6 mm Phillips #1 screws.

  10. C4loNxtiDSrZYQQK
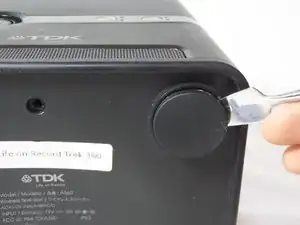
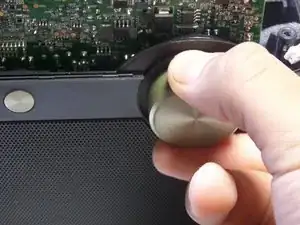
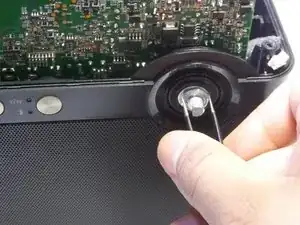
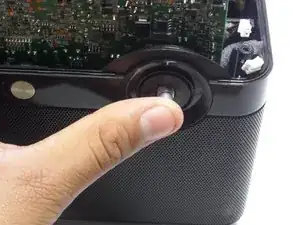
    • Remove the volume control knob, which is located at the front of the speaker, by pulling it towards you.

  11. dVQ4aoGUBQGSynYj
    • Using tweezers, turn the nut counter-clockwise and remove the nut.

  12. kPZDI32pUXbfyNAL
    • Push the metal part that holds the volume control knob away from you.

  13. jJiWC4qTOlx2VE1n
    • Remove the four 13 mm Phillips #1 screws.

  14. XtNqfBFFdvsECYPS
    XtNqfBFFdvsECYPS
    BoDWpxDmKcHy42Co
    • Use your left hand to hold the top portion of the speaker in place.

    • Using your right hand, pull the handle away from the device.

Conclusion

To reassemble your device, follow these instructions in reverse order.

Eduardo Barrios

Member since: 14/09/15

323 Reputation

0 comments