Introduction

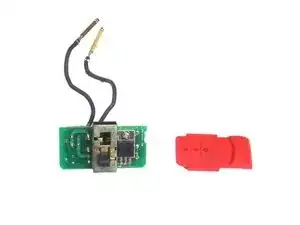
If the power switch is stuck or not functioning anymore, you will need to replace the power switch circuit board. in order to replace the power switch circuit board you will need to remove the saw casing and motor assembly.

  1. ETr6OdrTT4eLDToB
    • Unplug the saw before attempting any of the replacement guides.

    • Orient the saw so that the handle is closest to you and the saw end points towards the left.

  2. qEcEwpJ5BeXQPTbA
    qEcEwpJ5BeXQPTbA
    QOwnBcPcmAnvbSaD
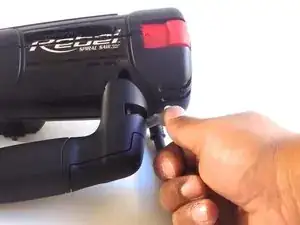
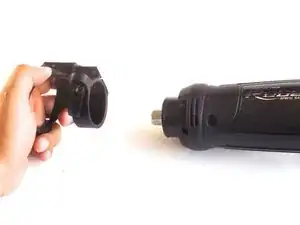
    • Push down on the grey lock on the right side of the handle to unlock it.

    • Pull the handle to detach it from the saw.

  3. bRAII1rW6DLRakve
    bRAII1rW6DLRakve
    BHqnn3J1wXwGTTSG
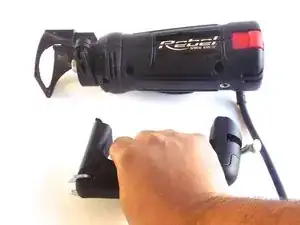
    • Lift the black lock at the tip of the saw to unlock the depth gauge.

    • Pull the depth gauge to detach it from the saw.

  4. CRytr3ww43xeZodL
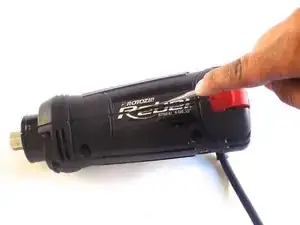
    • Rotate the device so that the bottom of the saw is facing upwards.

    • Remove the six 20mm screws with a 6mm flathead screwdriver.

  5. UiyWXClMYTiAnhUK
    UiyWXClMYTiAnhUK
    EHSXKXh2UAavlJEY
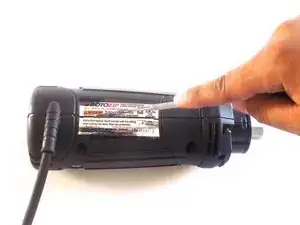
    • Cut through the stickers on the right and left sides of the saw using a metal spudger.

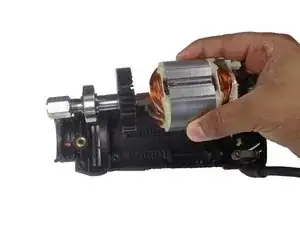
    • Pull off the top half of the casing.

  6. jJlXcXDhlyNLNavT
    • Lift the motor assembly out of the casing.

    • The white plastic piece connecting the wires and holding the motor brushes in place is fragile. Be careful to not break it when removing the motor assembly.

  7. v3cBUn2PXaNSlySs
    v3cBUn2PXaNSlySs
    OGiTJqG6GbDDTRNH
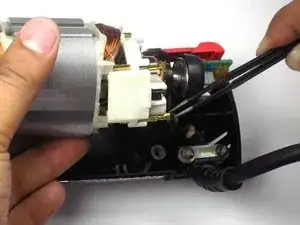
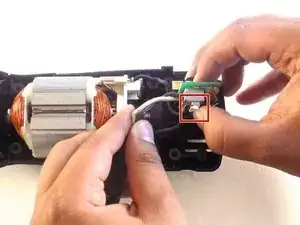
    • Detach the wire connected to the bottom of the motor assembly.

    • Rotate the motor away from you so that the second wire is visible, and detach that wire as well.

  8. LjOxlJl1YJgPTPFi
    LjOxlJl1YJgPTPFi
    5fhBSBDWqoplyKCt
    • Slide the red bumper switch off the casing.

    • The power cord is not shown, but does not need to be removed.

  9. oTG4NKhljZR313eg
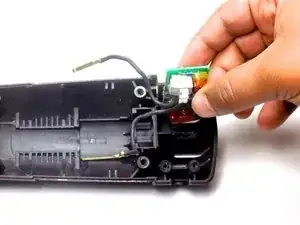
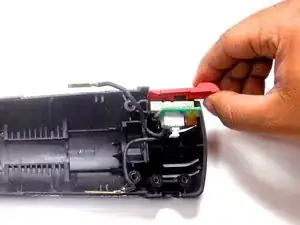
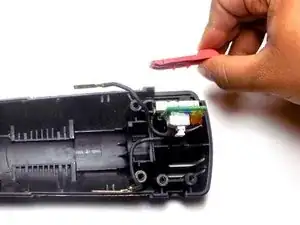
    • Pinch the two white clips with your thumb while simultaneously pulling the black and white wires.

    • The motor assembly is shown in this picture, do not worry about it since you have removed it in the previous steps.

  10. hHVEFThvlgjAycBI
    • Pull the circuit board upward to remove it from the casing.

Conclusion

To reassemble your device, follow these instructions in reverse order.

Lauren Russell

Member since: 05/10/16

224 Reputation

One comment

Nice guide, I can’t seem to find the switch online, it seems to be discontinued

Andrew Doble -