Introduction

Need to clean out every last speck of dust? Scratched your sensor filter? Swapping out the filter for a custom modification? This guide can help.

  1. KOCEHOH3SL6C2m3L
    KOCEHOH3SL6C2m3L
    jBA2nkaAVMkBQyyU
    LOH6udx1MfHOIRbj
    • The battery door has been removed for clarity, but is not necessary. See this guide for how to remove it.

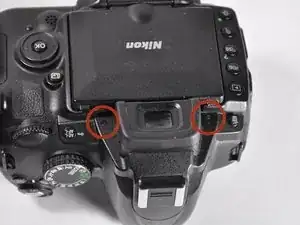
    • Unscrew the eight Phillips #00 screws on the back panel:

    • Two 2.5x6mm screws above the screen.

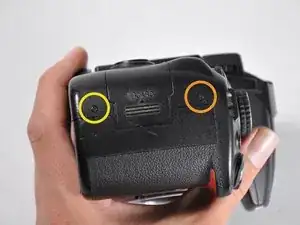
    • One 3x6mm screw on the upper part of each side (two total; right side shown).

    • One 3x7.5mm screw on the lower part of each side (two total).

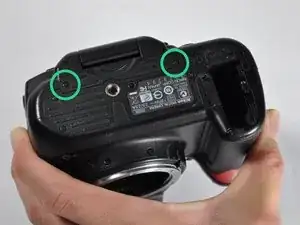
    • Two 3x4.5mm screws on the bottom.

  2. EHVMBhmvjenNV35D
    EHVMBhmvjenNV35D
    lb3r2SjtRDXkD521
    N6GEIltMYuFPfn2G
    • Pull the back panel up, then tilt it back. There will be two cables still holding it on.

    • Doing this will also release the connector cover on the left side. Set it aside for now, but remember to reinstall it later.

    • Disconnect the ribbon cable by flipping the black tab up, then pulling the cable out.

    • This procedure also applies to all of the other ribbon cables in the D5000.

    • Pull out the other connector by lifting it up with tweezers, or by prying it out. Fingernails also work well.

    Orange pulls straight up, if it does not want to come up, use your nails from the sides and pull up.

    Be careful with the other ribbon cables, the latches swing up easily with your nail, but can be easy to break if you do it wrong.

    Joseph -

  3. 2KNfAhsGTuArxgXQ
    2KNfAhsGTuArxgXQ
    3yw5EGpY1E6OJFw3
    orM3PbnBTxAZC42R
    • Disconnect the six ribbon cables by releasing the clips and pulling the cables out.

    • Pry off the gold-plated connector with an opening tool, spudger, tweezers, or a fingernail.

    • Disconnect a seventh ribbon cable in the lower-right corner.

  4. Jy13FnveOtafGhNF
    • Desolder the five wires attached to the back of the board.

  5. nmKRPSjCXuFX1oxW
    nmKRPSjCXuFX1oxW
    OTYSqUVAeZZjtBkR
    • Remove the five silver Phillips #00 4x4mm screws.

    • One is hiding under the wide ribbon cable in the lower-right corner.

  6. E4MFXNRCUGCvJNTV
    E4MFXNRCUGCvJNTV
    TZucMr2lJRggOgSG
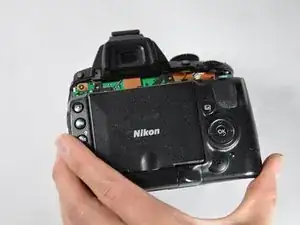
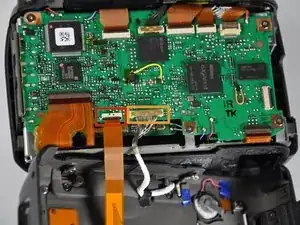
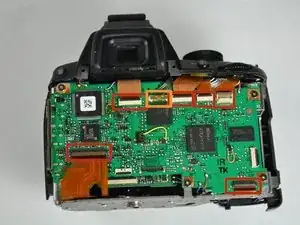
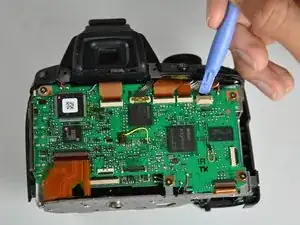
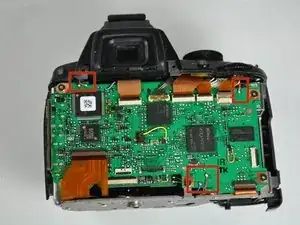
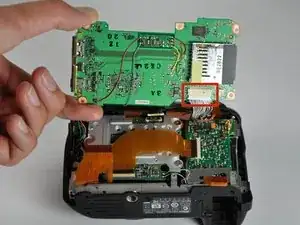
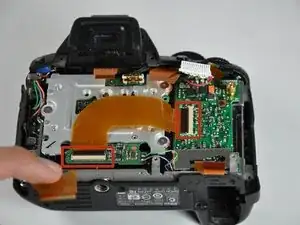
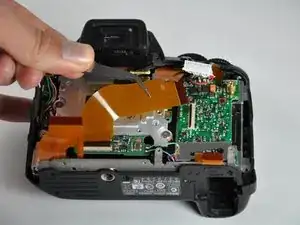
    • Flip up the motherboard.

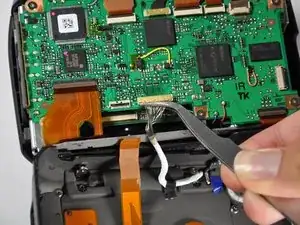
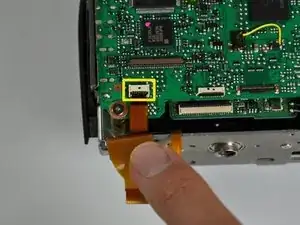
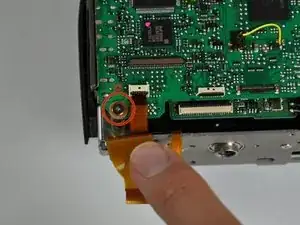
    • Remove the white cable connector by pulling it out of its socket with a spudger or fingernails.

  7. rLJ4md2BYE6Dakrl
    rLJ4md2BYE6Dakrl
    2AZkONtYsh6QNSih
    • Remove the L-shaped ribbon cable from both of its connectors.

  8. F1H2d1RlfIOMBLEn
    F1H2d1RlfIOMBLEn
    EY3pEPHtrHXaMhgq
    • Remove the three silver 5x5mm screws.

    • Between the metal backing plate and the standoffs for each screw is a copper washer. Don't lose them!

    • Flip the sensor board out.

    • Be extremely careful from this point on. Dust or scratches on any part of the sensor or its filters can affect picture quality.

  9. 4LTtdHDNACMk4gIY
    4LTtdHDNACMk4gIY
    kLJBJlRrQVxYFXTw
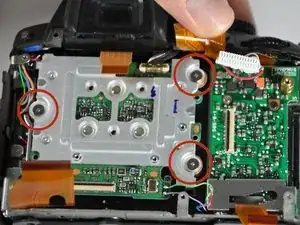
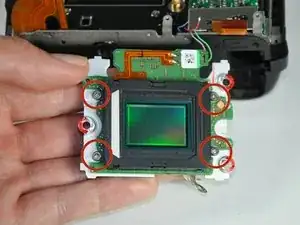
    • Remove the four silver 3.5x3.5mm screws securing the dust cover.

    • Pull the cover straight up to remove it.

  10. CgVuEYIYjJXT3Zrk
    CgVuEYIYjJXT3Zrk
    slOdReFsfxvf2KbO
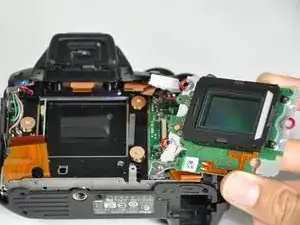
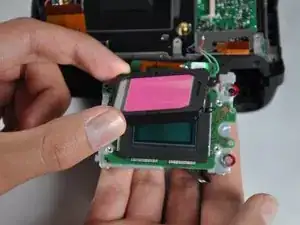
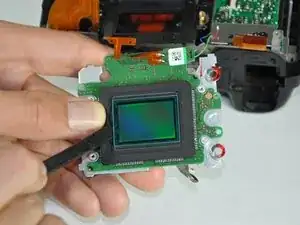
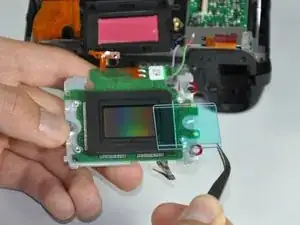
    • To remove the sensor filter, pull back the rubber gasket to expose the edge. Use a spudger or opening tool to carefully pry out the filter.

Conclusion

To reassemble your device, follow these instructions in reverse order.

Jacob Rardin

Member since: 14/04/14

1400 Reputation

One comment

Excelente guía, solo que debo cambiar las cortinillas y creo que es por el frente de la cámara

alcova35 -