Introduction

Use this guide to replace the front speaker grille

  1. QIXiWpZdDQdBRSLx
    QIXiWpZdDQdBRSLx
    T2srHkvyOwBELHkv
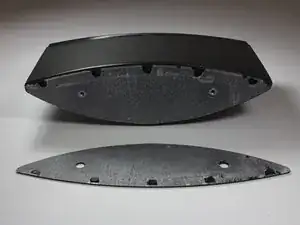
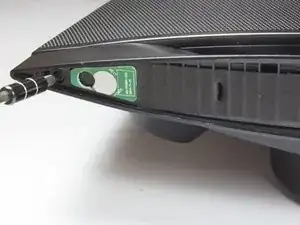
    • Use a spudger or your fingers to pry off and remove the rubber pad on the bottom of the speaker.

  2. IHKPqK46J4iFvkis
    IHKPqK46J4iFvkis
    AY2SZVIxZfd2bUAl
    IJdHEdDmFBEjxv3L
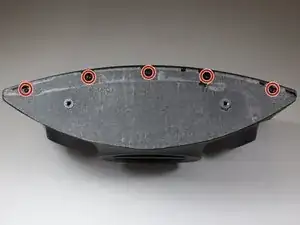
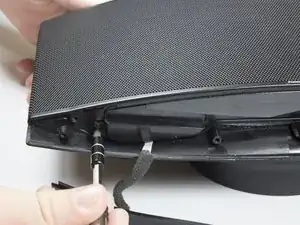
    • Remove the five 10mm screws with a TR 10 screwdriver.

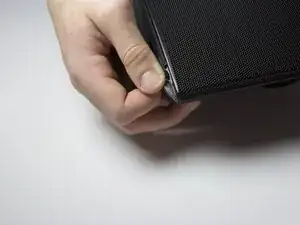
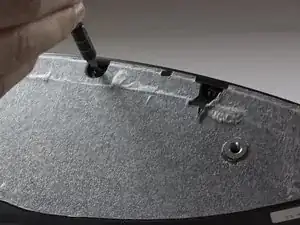
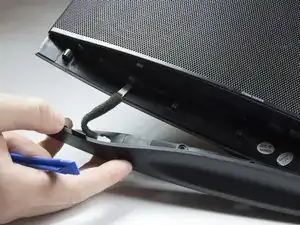
    • Use a spudger to break the remaining adhesive holding the grille to the speaker body.

    • Be sure you don't bend the grille; it is not free from the speaker yet.

  3. jyOiHYB3OJKLNSeG
    • Flip speaker around and use a plastic opening tool to remove the top panel from the speaker.

  4. 4EWibNA5tOYEoDCP
    4EWibNA5tOYEoDCP
    DvVkADKrjYQjKK2h
    rQSGuaQH5H5kSYDg
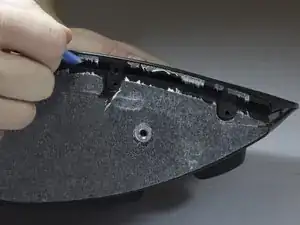
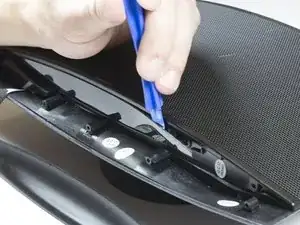
    • Use a plastic opening tool to remove the foam and uncover four more screws.

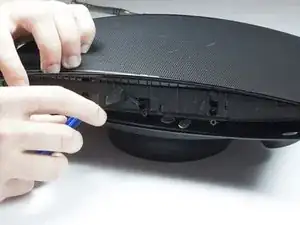
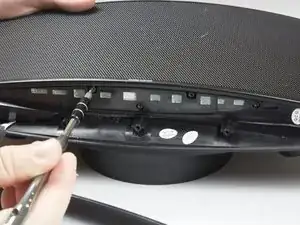
    • Use a TR 10 screwdriver to remove the five 10mm screws on the top of the speaker.

  5. 1KuEQGAvOqFFHtyk
    1KuEQGAvOqFFHtyk
    DQAvQLLW2EGxUP2B
    • Carefully remove the top cover.

    • Be careful not to tear or stress the cable that provides power to the power LED.

  6. RBiRFnm6QTGXodOW
    RBiRFnm6QTGXodOW
    VKijPkQPwlTqckBx
    • Use a TR 10 screwdriver to remove two of the 10mm screws that secure the speaker grille.

    • Do not attempt to remove the grille just yet.

  7. XruVTAhVdsoHVNEZ
    XruVTAhVdsoHVNEZ
    gLPe56K1qDmXwXjt
    DvJWnOWybuTpNPSG
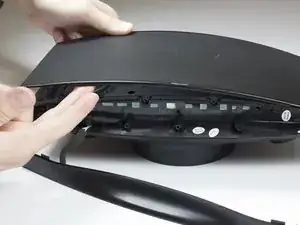
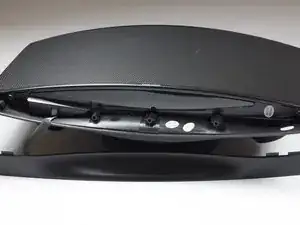
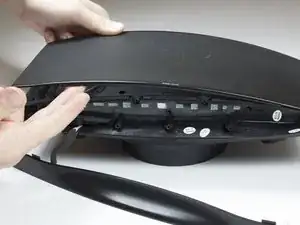
    • With the top panel removed, use a spudger to remove the display panel.

    • The clips on the display panel are quite fragile. Pry up both edges of the display before attempting removal.

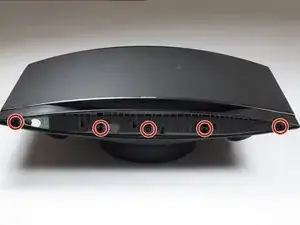
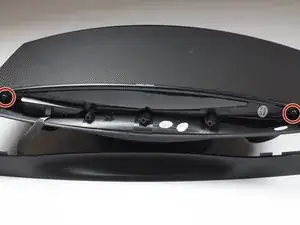
    • Use a TR 10 screwdriver to remove the four final 10mm screws securing the speaker grille.

  8. i1wFlIOCQUJOQ6nj
    • Remove the front speaker grille.

Conclusion

To reassemble your device, follow these instructions in reverse order.

Shaw Hughes

Member since: 31/01/17

831 Reputation

0 comments