Introduction

  1. ZTN1owbLfeNQMiUW
    ZTN1owbLfeNQMiUW
    OSZw3JoZxIJmdrAW
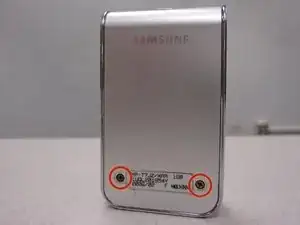
    • Remove the 2 screws on the back cover using a Phillips head #0 screwdriver.

  2. tBEh21jPI6ORarab
    tBEh21jPI6ORarab
    OUShLBbeWJRYNETm
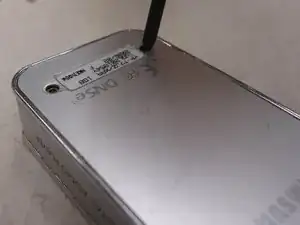
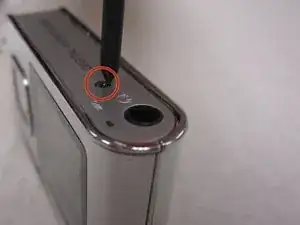
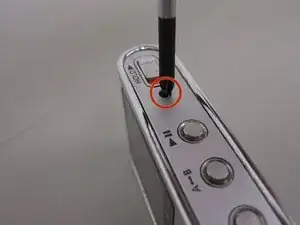
    • Remove the screw on each side of the device using a Phillips head screwdriver.

  3. OQiVCVmjykmc3pNe
    OQiVCVmjykmc3pNe
    sqapc32WTp5VMskK
    COO6BMPOhbDNa4PI
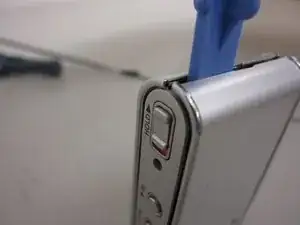
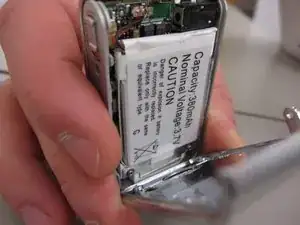
    • Using the plastic opening kit, place the prying end of the kit into the opening created by removing the screws.

    • Gently pry open the back cover. Insert the plastic opening tool in between the cover joints.

  4. dSJR4WETQ1s4UYeQ
    dSJR4WETQ1s4UYeQ
    XZELkCALcN3SKvnX
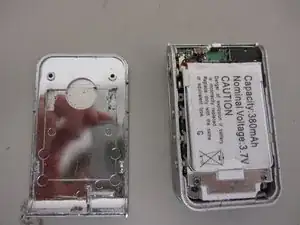
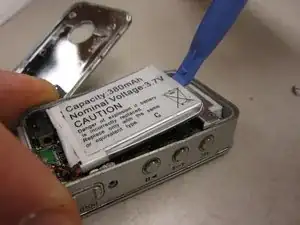
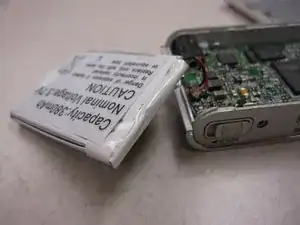
    • Once the back cover has been removed the battery will be visible.

    • Pry the battery from the device.

    • NOTE: The battery should still be connected to the device

  5. uWJvRXvNXQmkgkAS
    uWJvRXvNXQmkgkAS
    sJZUXUBAOEEHkSNG
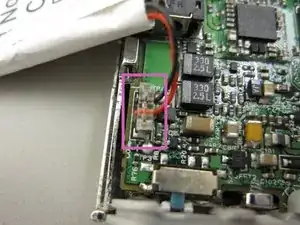
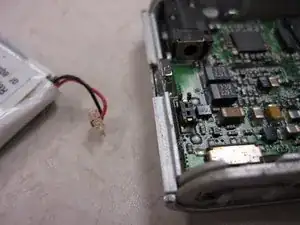
    • Unplug the battery connecting cables.

    • NOTE: The battery now should be free from all connections to the device.

  6. JceMbjc2mfRUT5t5
    JceMbjc2mfRUT5t5
    r4QUsCeFoOJsRvPh
    mEsuBsAJqmgGxRI2
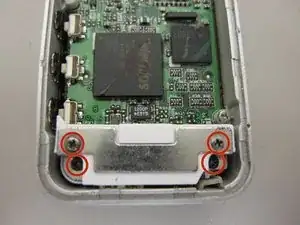
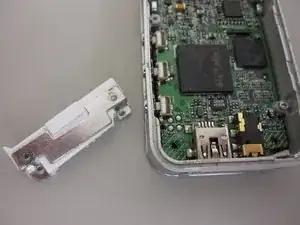
    • Once the battery has been removed you can see the motherboard.

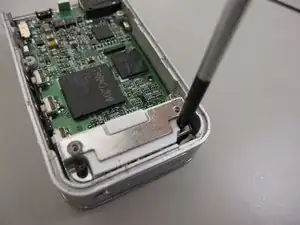
    • Unscrew 4 screws on the metal docket using a Phillips head screw driver.

    • The USB connector can now be taken off of the device.

Conclusion

To reassemble your device, follow these instructions in reverse order.
Dylan Peters

Member since: 18/10/13

409 Reputation

0 comments