Introduction
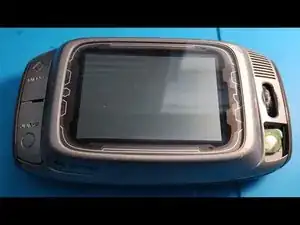
Here's a complete guide to replacing the battery in your first generation (2002) Danger Hiptop Sidekick. Nearly all of these phones will have a completely dead battery that cannot be charged. Details are provided on how to select a replacement battery, and what kind of charger to use.
This guide may work for the later color screen version of first generation, but will not work for later generations.
-
-
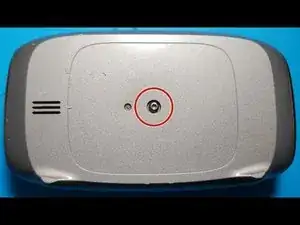
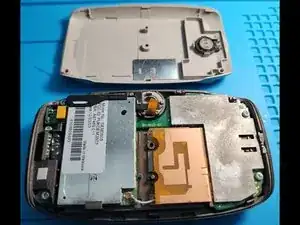
Remove one Torx T7 screw 6mm long from the back, then use a spludger to separate the back from the main case.
-
-
-
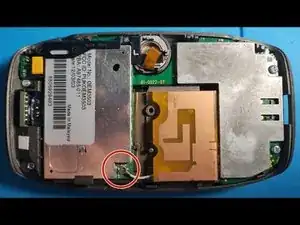
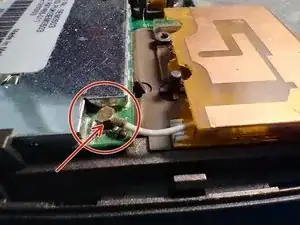
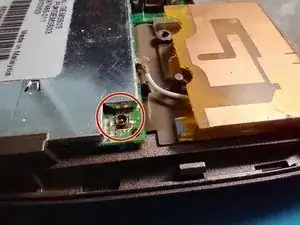
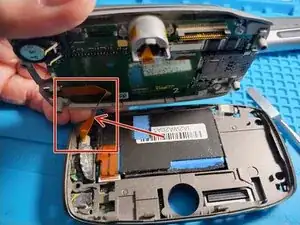
Locate the antenna connector. With a spludger, gently pry up under the connector where indicated, and it will pop off.
-
-
-
Remove the RF module as follows:
-
Remove a Phillips PH1 x 6mm screw from the left side of the black plastic bracket.
-
Remove a skinny Phillips PH0 x 7mm screw from the right side of the plastic bracket.
-
Slide the black plastic bracket carefully from underneath the display ribbon cable towards the left, and set it aside.
-
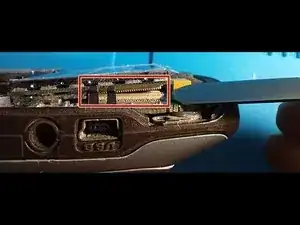
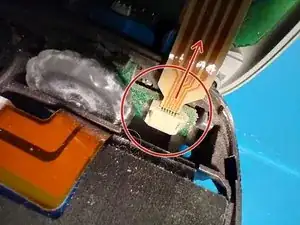
The RF module is now held by a clip at the bottom, a small round locator pin on the lower right, and a connector at the top edge, underneath. Use a spludger at the top edge to pry the RF module connector loose. It will pop off.
-
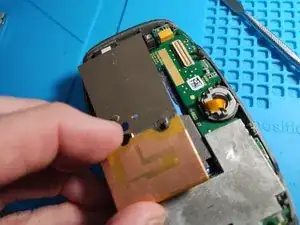
Now just lift and slide the RF module up, and will clear the tab at the bottom. Set the RF module aside.
-
-
-
Use a spludger to pry all the way around the front of the case to release it. Be careful not to damage the thumb wheel board ribbon cable which is still attached.
-
-
-
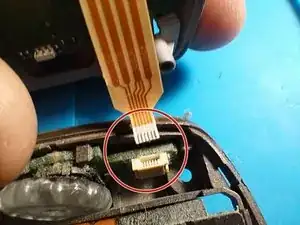
Use a pair of tweezers to grip the thumb wheel board ribbon cable, and pull it straight up to disengage it. To replace it later, just use tweezers to press it straight down into the connector.
-
-
-
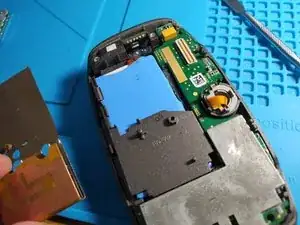
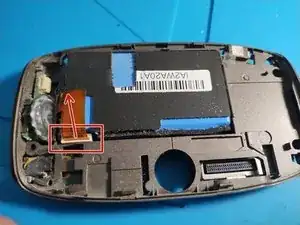
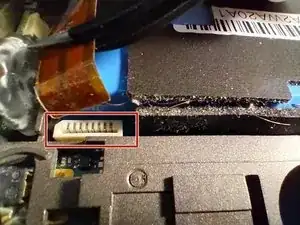
The battery is now able to be removed. Use a pair of tweezers to pull straight up on the battery ribbon cable. To replace it later, you just use tweezers again to press it straight down into the connector.
-
-
-
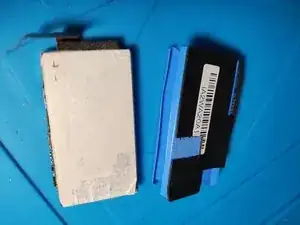
Use a razor or Xacto knife to slice the blue plastic battery sleeve, and remove the battery from the sleeve. Slice along the side without the battery manager circuit board.
-
-
-
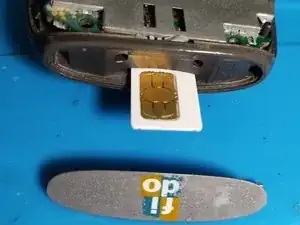
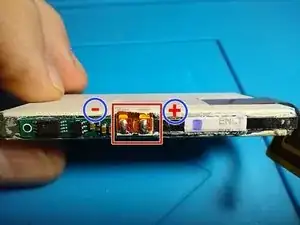
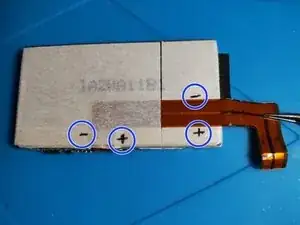
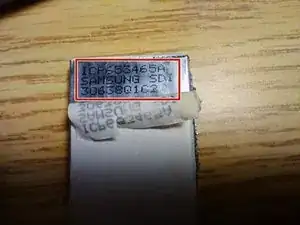
Battery polarity is as indicated.
-
Battery part number is Samsung SDI ICP653465A, 1200mAh nominal 3.6V Li-ion with built-in protection board on the side of the battery
-
The part number 653465 means 6.5mm thick, 34mm wide, 65mm long. You'll find plenty of replacement batteries online that are 6.5mm thick and 34mm wide, but none 65mm long. Just select one that's less than 65mm long and 1200mAh. Some replacement batteries claim to fit this model, but they must meet these dimensions.
-
You'll need to unsolder the flex cable from the battery management board on the side of the battery, and connect it to your replacement battery. Pay close attention to polarity.
-
After connecting the new battery to the flex cable, place some Mylar tape over the battery management board to insulate it.
-
Replace the blue plastic cover over the battery, and seal with Mylar tape.
-
Place the battery back into the case, and reassemble the phone.
-
-
-
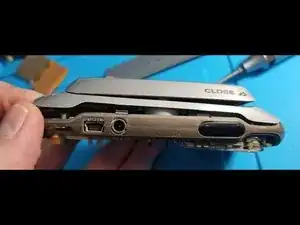
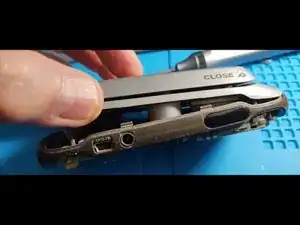
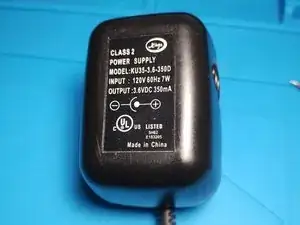
A word about chargers. There is no documentation on this. The charging port is center positive (+), and uses a barrel connector that measures 3.45mm outside diameter. So a nominal 3.5mm barrel connector should work fine.
-
As for charging voltage, the battery inside is a 3.6V Li-ion battery, so a charger voltage of 4.2V is appropriate. Do NOT use a 5V source, or damage will result. There is no way to tell if the phone has over-voltage protection, so keep below 4.2V to be safe.
-
Many old Nokia phone chargers put out 3.6V, so this might be a good source for a charger.
-


To reassemble your device, follow these instructions in reverse order.