Introduction

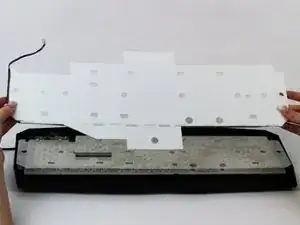
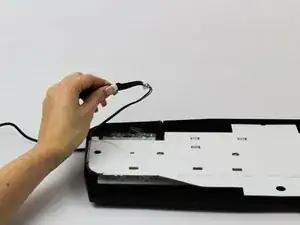
The LED backlight may burn out, causing the backlight to cease working properly. This guide will demonstrate how to replace the LED backlight.

  1. guaR6NWlsRJvMLCr
    guaR6NWlsRJvMLCr
    DSMnhA1anwMAJRVv
    • Be sure to unplug the keyboard before starting the disassembly.

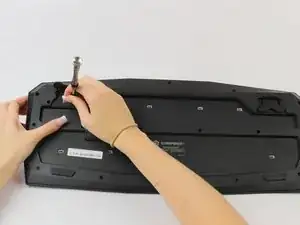
    • Remove the two 10 mm length screws using the Phillips head #1 which are located underneath the kickstand of the keyboard and directly next to it.

  2. OMPHyOoSVwmfpQoC
    OMPHyOoSVwmfpQoC
    KgGZ1yrqLcKXPU5N
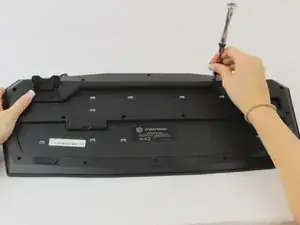
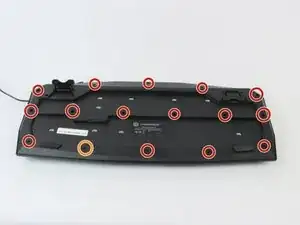
    • Remove the sixteen 5 mm length screws using the Phillips head #2.

    • One of the screws may be located underneath a manufacturer's sticker.

  3. Fal2xWPNaBIuYrbi
    • Lift up and remove the plastic casing.

  4. xixlxDhVSwSUr5ud
    • Remove the metal backing located directly underneath the white plastic casing.

  5. n5NqS5ATRXKCmoG4
    • Be careful not to pull too hard on the ribbon cable, as it may break.

    • Disconnect the ribbon cable that connects the LED board to the motherboard.

  6. DdBlBKSCevDiXohy
    • Carefully remove the LED board, which should now come free from the casing.

Conclusion

To reassemble your device, follow these instructions in reverse order.

Braydon Lantz

Member since: 12/02/18

229 Reputation

0 comments