Introduction
-
-
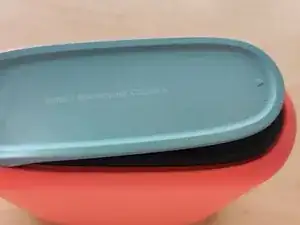
Start by pulling on the outer edges of the rubber part on the bottom of the enclosure.
-
Note that it will not detach completely from the enclosure.
-
-
-
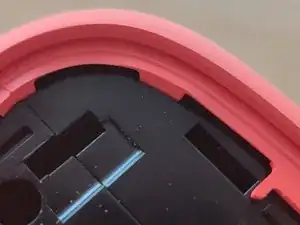
Pry between the black hard plastic base and the colored rubber casing of your speaker.
-
The bottom of the speaker unclips, and you have access to the rings that hold the colored envelope.
-
-
-
Pull on the colored envelope, folding it on itself outwards.
-
By removing the cover, the protective foam of the microphone will be damaged, the water resistance will be impacted.
-
-
-
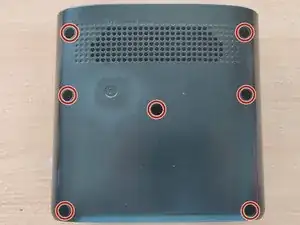
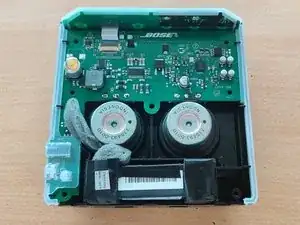
Remove the 7 screws on the back of the enclosure.
-
And you access the interior of the enclosure (the battery has already been replaced in the photo shown).
-
-
-
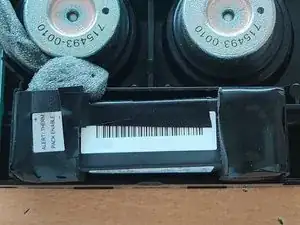
Cleanly cut the foam and battery wrap.
-
The foam and the envelope will be used for reassembly (to avoid vibrations).
-
Be careful not to puncture the battery or it may catch fire.
-
-
-
Solder the new battery, and replace the envelope with the foam, holding everything with tape.
-
For reassembly, follow this guide in reverse order.
-


To reassemble your device, follow the instructions in reverse order.
4 comments
Please be advised that the Bose support website has a firmware update that fixes some battery issues. I took my dead - non-charging Soundlink Color II apart and then found the website and fixed the issue with the firmware update! The update website is located @ http://btu.bose.com
Beware that, after the battery gets undervolted (like 2.4V), the device does not seem to accept an externally charged battery and continues to act dead, until it finds some form of comfort over its USB input. Not from a dumb 5V power supply, but from an USB charger or PC supporting some level of power delivery extension, and an appropriately wired lead.
Please list type of battery and where to find it it took me a while to find it